
Smart Home Energy Management: How Automation Systems Reduce Power Bills While Increasing Comfort
May 8, 2025
Creating an Electrical Safety Plan for Families with Young Children
May 23, 2025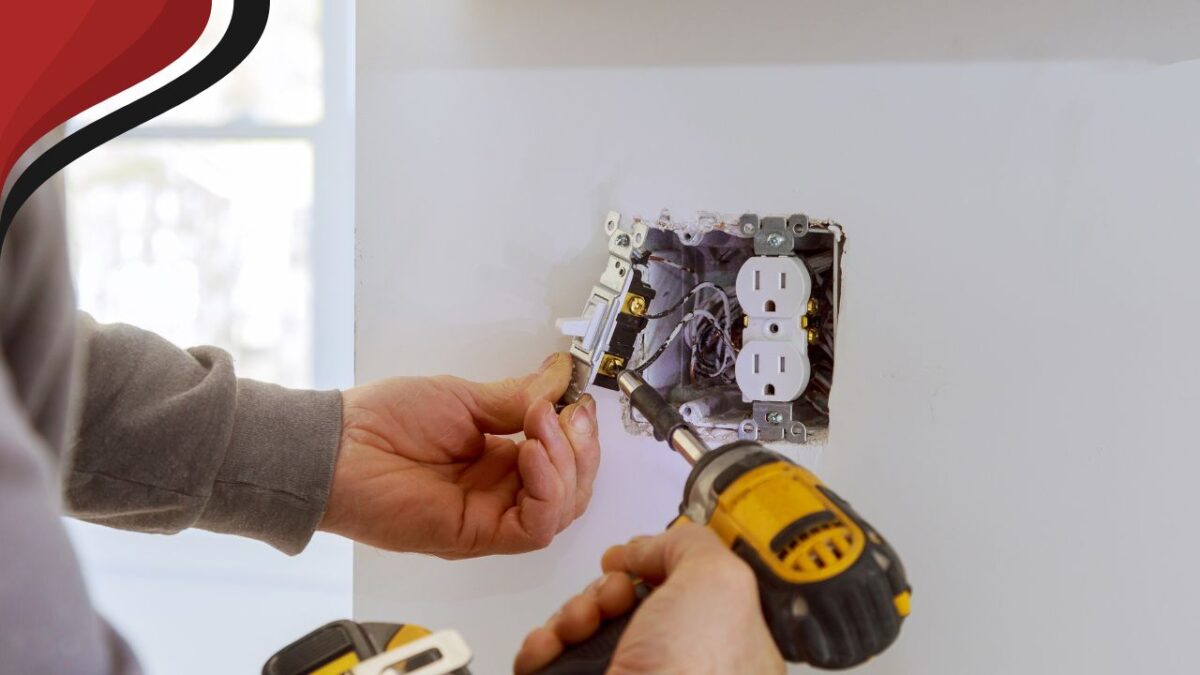
Replacing outdated electrical outlets is one of the most straightforward and valuable upgrades homeowners can perform to improve safety, functionality, and energy efficiency in the home. As homes age, so do their electrical systems—and many still operate with two-prong outlets, worn connections, or outdated designs that can pose hazards or fall short of modern device needs.
Whether you’re renovating, upgrading to smart home tech, or simply improving safety, knowing how to replace an old outlet can help you take control of your home’s power infrastructure.
According to Tyson Orth Wollongong, a respected electrical businessman and Managing Director at Nexa Electrical Solutions, “One of the first things we inspect in older homes is the condition and type of outlets. Replacing outdated electrical outlets not only enhances function but is critical for reducing fire risk and electrical faults.”
This guide walks you through the process step by step, ensuring safe and efficient results—even for DIYers with basic experience.
Why Replace Outdated Electrical Outlets?
There are several reasons to replace old outlets, including:
- Safety: Older outlets may have loose connections or lack grounding, increasing fire and shock risks.
- Code Compliance: Modern electrical codes often require tamper-resistant or GFCI outlets in specific areas.
- Device Compatibility: Newer devices need grounded or USB-integrated outlets for optimal performance.
- Smart Home Integration: Modern outlets can be upgraded to smart versions compatible with home automation systems.
Whatever your reason, the benefits of replacing outdated electrical outlets far outweigh the effort.
Tools and Materials Needed
Before getting started, gather the necessary tools and safety equipment:
- Voltage tester
- Screwdriver set (flathead and Phillips)
- Needle-nose pliers
- Wire stripper
- New outlet(s)
- Electrical tape
- Faceplate(s)
- Flashlight or headlamp
- Circuit tester
Optional: GFCI or smart outlet, depending on your upgrade.
Step 1: Turn Off Power to the Outlet
Safety first. Head to your home’s electrical panel and switch off the breaker that controls the outlet you’ll be working on. If you’re unsure which breaker it is, turn off the main power to be safe.
Use a voltage tester to double-check the outlet is not live before proceeding. Never assume an outlet is safe without testing it.
Step 2: Remove the Old Outlet
Unscrew and remove the faceplate. Then, unscrew the outlet from the electrical box and gently pull it out to expose the wires.
Inspect the existing wiring:
- Two wires (hot and neutral) may indicate an ungrounded outlet.
- Three wires (hot, neutral, and ground) are standard for modern outlets.
If you notice frayed wires, aluminum wiring, or signs of burning or melting, stop and call a licensed electrician.
Step 3: Disconnect Wires
Before removing the old outlet, take a picture of how the wires are connected—this will help when installing the new outlet.
Loosen the terminal screws and carefully disconnect the wires using needle-nose pliers. Some outlets use push-in terminals; you may need a small screwdriver to release the wires.
Label the wires if needed to keep track of hot (usually black or red), neutral (white), and ground (bare copper or green).
Step 4: Prepare and Inspect Wiring
Check wire condition and length. If insulation is worn or wires are short, strip off about ¾ inch of insulation with a wire stripper to expose clean copper.
Ensure all wire ends are clean, not frayed or corroded. Twist strands neatly if you’re working with stranded wire.
Step 5: Connect the New Outlet
Match each wire to the appropriate terminal on the new outlet:
- Hot (black or red): Brass screw
- Neutral (white): Silver screw
- Ground (bare or green): Green screw
Make tight, clockwise loops on the terminal screws, ensuring firm contact. Tighten screws securely but avoid over-tightening.
Wrap the outlet sides with electrical tape to cover the screws for added safety.
Step 6: Secure the Outlet and Replace Faceplate
Carefully fold the wires back into the box, making sure nothing is pinched or kinked. Secure the outlet with screws and attach the new faceplate.
If upgrading to a USB or smart outlet, follow the manufacturer’s specific installation instructions, as these may include additional steps or setup.
Step 7: Restore Power and Test
Turn the breaker back on and use a circuit tester to confirm the outlet is working properly and wired correctly.
If you installed a GFCI outlet, press the “Reset” button to activate it. Test both buttons (Test and Reset) to confirm it trips and resets as expected.
When to Call a Professional
While many homeowners can handle replacing outdated electrical outlets themselves, certain situations require professional help:
- Outlets feel warm or spark
- Aluminum wiring is present
- No ground wire exists in older homes
- The outlet box is damaged or corroded
- You’re unsure of local building codes
As Tyson Orth Wollongong emphasizes, “When in doubt, it’s always worth consulting a licensed electrician—especially if your home is over 30 years old or hasn’t had an electrical inspection in recent memory.”
Tips for Upgrading Multiple Outlets
If your home has several old outlets, consider replacing them all at once. You can also mix in:
- Smart outlets that allow remote control via smartphone
- Tamper-resistant outlets for child safety
- GFCI outlets in bathrooms, kitchens, and outdoor areas
- AFCI outlets for enhanced fire protection in living spaces
Replacing outdated electrical outlets room-by-room may take time, but it can transform your home’s safety profile and electrical efficiency.
Replacing outdated electrical outlets is a manageable project that can deliver outsized benefits. From protecting your home to supporting the demands of modern devices, this upgrade is worth the effort for any homeowner looking to modernize responsibly.
With the right tools and a methodical approach, you can increase safety, energy efficiency, and long-term reliability. As Tyson Orth Wollongong puts it, “A simple outlet swap might seem minor, but it’s often the first step toward a smarter, safer, and more capable home electrical system.”